This is my first attempt at a sculpty in Maya. It's a teddy bear!
[IMG]http://i194.photobucket.com/albums/z91/keira_fatali/maysculpts/bearwireframe.jpg[/IMG]
This is the bear with smooth shade all turned on, as well as wireframe on shaded, still in Maya.
[IMG]http://i194.photobucket.com/albums/z91/keira_fatali/maysculpts/nolighting.jpg[/IMG]
This is the bear rendered in Maya without lighting. If I can figureout how to get the textures to load like this in the export, I'll be happy. As it is, I had t add a light, so that's the next image.
[IMG]http://i194.photobucket.com/albums/z91/keira_fatali/maysculpts/bearrender.jpg[/IMG]
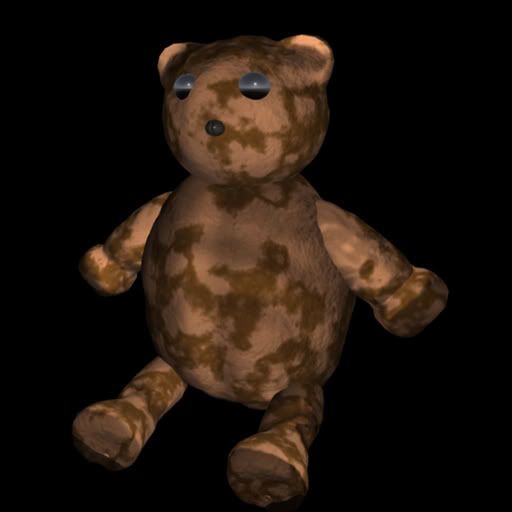
Rendered in Maya with the one ambient light I used for the sculpty export, with textures included.
[IMG]http://i194.photobucket.com/albums/z91/keira_fatali/bearinSLfixed2.jpg[/IMG]
The bear as seen in SL.
Specs:
9 Prims, 7 sculpties, 2 spheres.
7 baked textures. The sphere-eyes are just black with medium shiny at this point.
Methods used:
Every sculpty started out as a NURBS sphere with 32 sections and 31 spans. I started with a leg, scaled the sphere to lengthen it, and then used the sculpt tools to shape. Moved the control vertices on the botom of the foot in to smooth a little.
Second leg is a duplicate of first.
Body is slightly scaled and sculpted, with the bottom vertices moved up a little to flatten for easier sitting.
Arms are both the same, just different angles, and same method as legs. No manual vertex-movement though.
Head is non-scaled, then sculpted. The ears were done with sculpt tool with reflection turned on, and pulled out a ways. Then moved four vertices from the front of the ear back, to create a concave look.
Nose is purely sculpted, and scaled way down.
==============================
Textures are completely Maya, fur was done with a stucco, nose was just a dark grey Blinn.
Originally I bumpmapped it with a cloud texture and absolutely loved the look, but somehow the bumpmapping disappeared at some point.
Lighting is a single, default settings ambient light, above and in front of the bear. I really don't like the lighting, but it was a quick attempt.
===============================
Completion time:
20 minutes work not including export (Had to figure that out XD). In-world assembly time included.
===============================
Next steps:
This is my first Maya sculpt, but I want to get it looking how it did with the bumpmapping and such, in world. So at this point, I'm going to be working on the textures, adding lighter areas to the ears, better lighting, and bumpmapping for looks.
I may add a sculpted mouth, may just do it via texturing, and may leave no mouth at all, I kinda like it.
================================
There ya go, my first sculpt in Maya! Pretty easy, too.
I know, long post for something not that great, but I like to give a run-down of how I did things, and what I plan to do still. Gives people an idea of how I work, and what went into my work.
If you'd like a copy of the bear in-world yourself, send me an IM, it's free at this point, the final copy might be too.
If you'd like the maya scene, send me a PM here on the forums and I'll upload it somewhere. I don't anticipate anyone wanting it, but just in case.
===========================================================
Second post
===========================================================
First of all, sorry for the double post, but too many images in the above post with the newest added.
Anywho, my teddy is DONE! I am more than satisfied with the in-world version now, it turned out perfect in my opinion.
Here's the final render in Maya with the lighting and bumpmapping I used for the textures:
[IMG]http://i194.photobucket.com/albums/z91/keira_fatali/maysculpts/bearfinalrender.jpg[/IMG]
And here is the final product, in-world, with natural lighting, NOT full-bright (Not sure what time.. I think it was afternoon)
[IMG]http://i194.photobucket.com/albums/z91/keira_fatali/maysculpts/bearfinal.jpg[/IMG]
In the end I used two spotlights, one front and one back, and one ambient light essentially inside the base of his left leg.
The lighting is faint enough that I can use the SL lighting and have the shadows still look correct at just about any time of day (I checked with a 30 second daycycle, and loved it at all times).
Finally got the bumpmapping working too, which made me soo happy!
Also, resized the main body of the teddy a little bit, made it slightly smaller.
The bear is complete, and I'm honestly surprised at how good he looks. If anyone wants one, shoot me an IM free for all, just cause I'm so happy with the result ^_^

